Tuesday, October 23, 2012

What keeps me coming back

As I sit here nursing my second cold of the year wondering if all the colds and flus are worth it ( yes, elementary schools are germy places) I just received a note in my email written to me by a student's mom.  Here is the text:


My son loved the class on making thermometers and wrote in his journal,

"It was awesome! It was very, very, very epic!" 

 This is what keeps me coming back to the school each week despite all the germs!  I figure if I can just reach a few students and get them excited about science and engineering then this program is a success.

Thermometers for Fourth Grade

Last week we made thermometers in fourth grade.  One of the standards is to understand that temperature is the measure of thermal or heat energy in the atmosphere.  The students are required to use a thermometer to compare air temperatures over a given time period.   So, to help them better understand thermometers and the idea of force, we have them build a thermometer.  There are lots of directions on the web, but I started with the Teach Engineering site.  The activity is directed toward fifth graders, and is mainly about making a scale and comparing their own scale to a celsius or fahrenheit thermometer.  However, we concentrate just on making the thermometer itself and getting the students to explain to me exactly how it works.  Here is a great photo of a working thermometer and an enthusiastic student, excited to see the apparatus working.


You start with a plastic soda or gatorade bottle.  If you use the gatorade bottle, you need to drill a hole in the cap to insert the straw.  For the soda bottle, just use the bottle as is without the cap.  CAUTION:  water bottles will not work!  We found out the hard way that water bottles will not work.  The manufacturers have taken so much plastic out of the water bottles that they are very thin walled.  The walls are not strong enough to resist the pressure changes and they will not work.

You will also need a mixture of rubbing alcohol (1 to 1 ratio), a straw, and clay.  I also have a bucket of ice on hand, containers for iced water and very warm water, say 110 degrees or so.

Here is copy of the sheet that I use:


EaSiEE as PiTM
Engineering and Science in Elementary Education

Thermometers

1. Place the straw in the bottle with the alcohol/water mixture but do not let it touch the bottom.

2. Use clay to seal the neck of the bottle by making a snake out of the clay, wrapping it around the straw and putting it on the opening of the bottle.  DO NOT shove the clay in the bottle, but just seal the top and around the straw.

You now have a homemade thermometer.  Test it and see if it works.

  1. Cup your hands around the bottom of the bottle and see if the water/alcohol in the straw rises.  What is the approximate temperature of your body?  What is approximate room temperature?  What is the difference between the two?


If your thermometer doesn’t work, what could be wrong?  What are the three parts of the design.  What do you think you need to fix?


  1. Put the bottom of the bottle in warm water, what happens?  What happens if you put it in ice water.  Keep observing the bottle, does something interesting happen in the alcohol/water mixture?


  1. Why does the water/alcohol in the straw go up and down with temperature?


4.  Did you see bubbles in the water/alcohol mixture when you put it in the ice water?  Where did the bubbles come from?  Can you explain the phenomena?


Here are some students, getting the straw to the right height, and one of our wonderful volunteers looking on.


Here is a good photo of a thermometer working.  I color the water and alcohol mixture so that it is easier to see.  It is not easy to find clear straws.  Usually, you have to purchase them at a restaurant supply store.  But be careful, I did purchase some that were clear, the only ones they had, but they were brittle, so we had to go with the light colored straws.  The white ones that you can find are usually a bit opaque and not great for this application.  You can see the clay at the top of the bottle around the straw.  Also, this time, I could only find the straws with the flexible section.  You can cut them off, but it often makes them too short for the bottles.  Instead, have them place the flexible piece down inside the bottle. If you place it at the top, it often results in an air leak and a non-working thermometer.


The key to this device is the seal.  If the seal is not airtight, then the thermometer does not work.  You can see that the water/alcohol will rise just by heating with the hands.  If the water/alcohol does not rise in fairly short order, then there is a leak at the top.  Caution the students though, that if they squeeze the bottle, the mixture will shoot out the top!  

What is happening?  The system is sealed, when working properly.  As you heat the alcohol/water mixture, the mixture expands, but it cannot expand into the air in the bottle because there is nowhere for the air to go, so the only place the water/alcohol mixture can go is up the straw!  With a little coaching and some leading questions, the students are able to figure this out on their own.  

This is a fun activity, and all of them enjoy it.  There is always a bit of excitement when they work!


Tuesday, October 16, 2012

Creativity and Brainstorming for 2nd Grade

I started this school year visiting second grade.  The teachers selected the creativity exercise to start their year of activities.  In this activity, we start by discussing what an engineer is.  There will be a few students who discuss someone who drives the train, but many of the classes understood that an engineer is someone who designs and/or builds things.  We talk about all the different things that engineers have designed.  I ask the students to look around and name some things they think that engineers have designed.  Sometimes I get the idea that engineers only design things with engines, but then they begin to understand that pretty much everything around them has been touched by an engineer in some manner including their desks, the air conditioning system, the bus or car they rode to school in, the pencils they use, etc.  We talk about things that engineers do not design or build and they realize that it will be things in nature such as trees, animals, and humans.  Of course, I do not bring in genetic engineering, that is a discussion for later!

We then discuss how different designs come about.  Often there are water bottles sitting at the desks, so I will pick up two different designs and ask the students to talk about what is the same and different about the bottles.  The bottles all hold water, but the tops, the color, the size, and the shape can all be different.  I ask them why.  Eventually, we get to the idea that different engineers have different ideas about how to design the bottles for different needs.  I then ask them where the ideas come from, anad they will answer their brains.  This discussion leads into the creativity exercise.


This exercise encourages the kids to work as a team to come up with as many solutions to a challenge as they possible can.  I link this exercise to the discussion about the creativity of engineers and their designs.  The children are divided into teams of three or four.  The most challenging portion of this exercise is to work as a team.  Often one member will dominate the team, the idea is to get them all to contribute to the effort.

Introduction
Each team will be given a challenge box.  The challenge can come in many forms:
a.     A large, upside down cup taped to one corner of the box that contains a marble and a metal ball.  At the opposite corner is a cup, also taped to the box.  The challenge is to move the marble and metal ball from the large cup to the small cup without touching them.  
b.     A barrier is set in the middle of a challenge box.  The challenge is to move a marble and a metal ball over the barrier to the other side without touching the balls.
c.     A barrier is set in the middle of the challenge box, but on the other side is a cup which is taped down.  The challenge is to move a marble and a metal ball over the barrier into the cup without touching them with their hands.

This year, as you will be able to see from the photographs, I used option a.  Each year I put together the boxes from whatever I can find in my stash.  But these things can include:

Materials
·      2 or 3 index cards.
·      String, yarn, pipe cleaners, etc.
·      Blocks of various sizes.
·      Legos or tinker toys for building supports for a track.
·      Magnets
·      Straws
·      A square of aluminum foil
·      Paper clips
·      Washers
·      Any other items that you think could be useful
      Here are some photographs from the six sessions we ran last week.
  • In the photograph below, you can see some of the materials we included in the box, which were wooden blocks, index cards, rubber bands, a paper clip, a pipe cleaner, a sheet torn from a magazine, a chopstick, unit cubes, and a straw.  You can see the clear cup where the marble and metal ball are placed.


The photo below shows a group of boys working well together as a team.


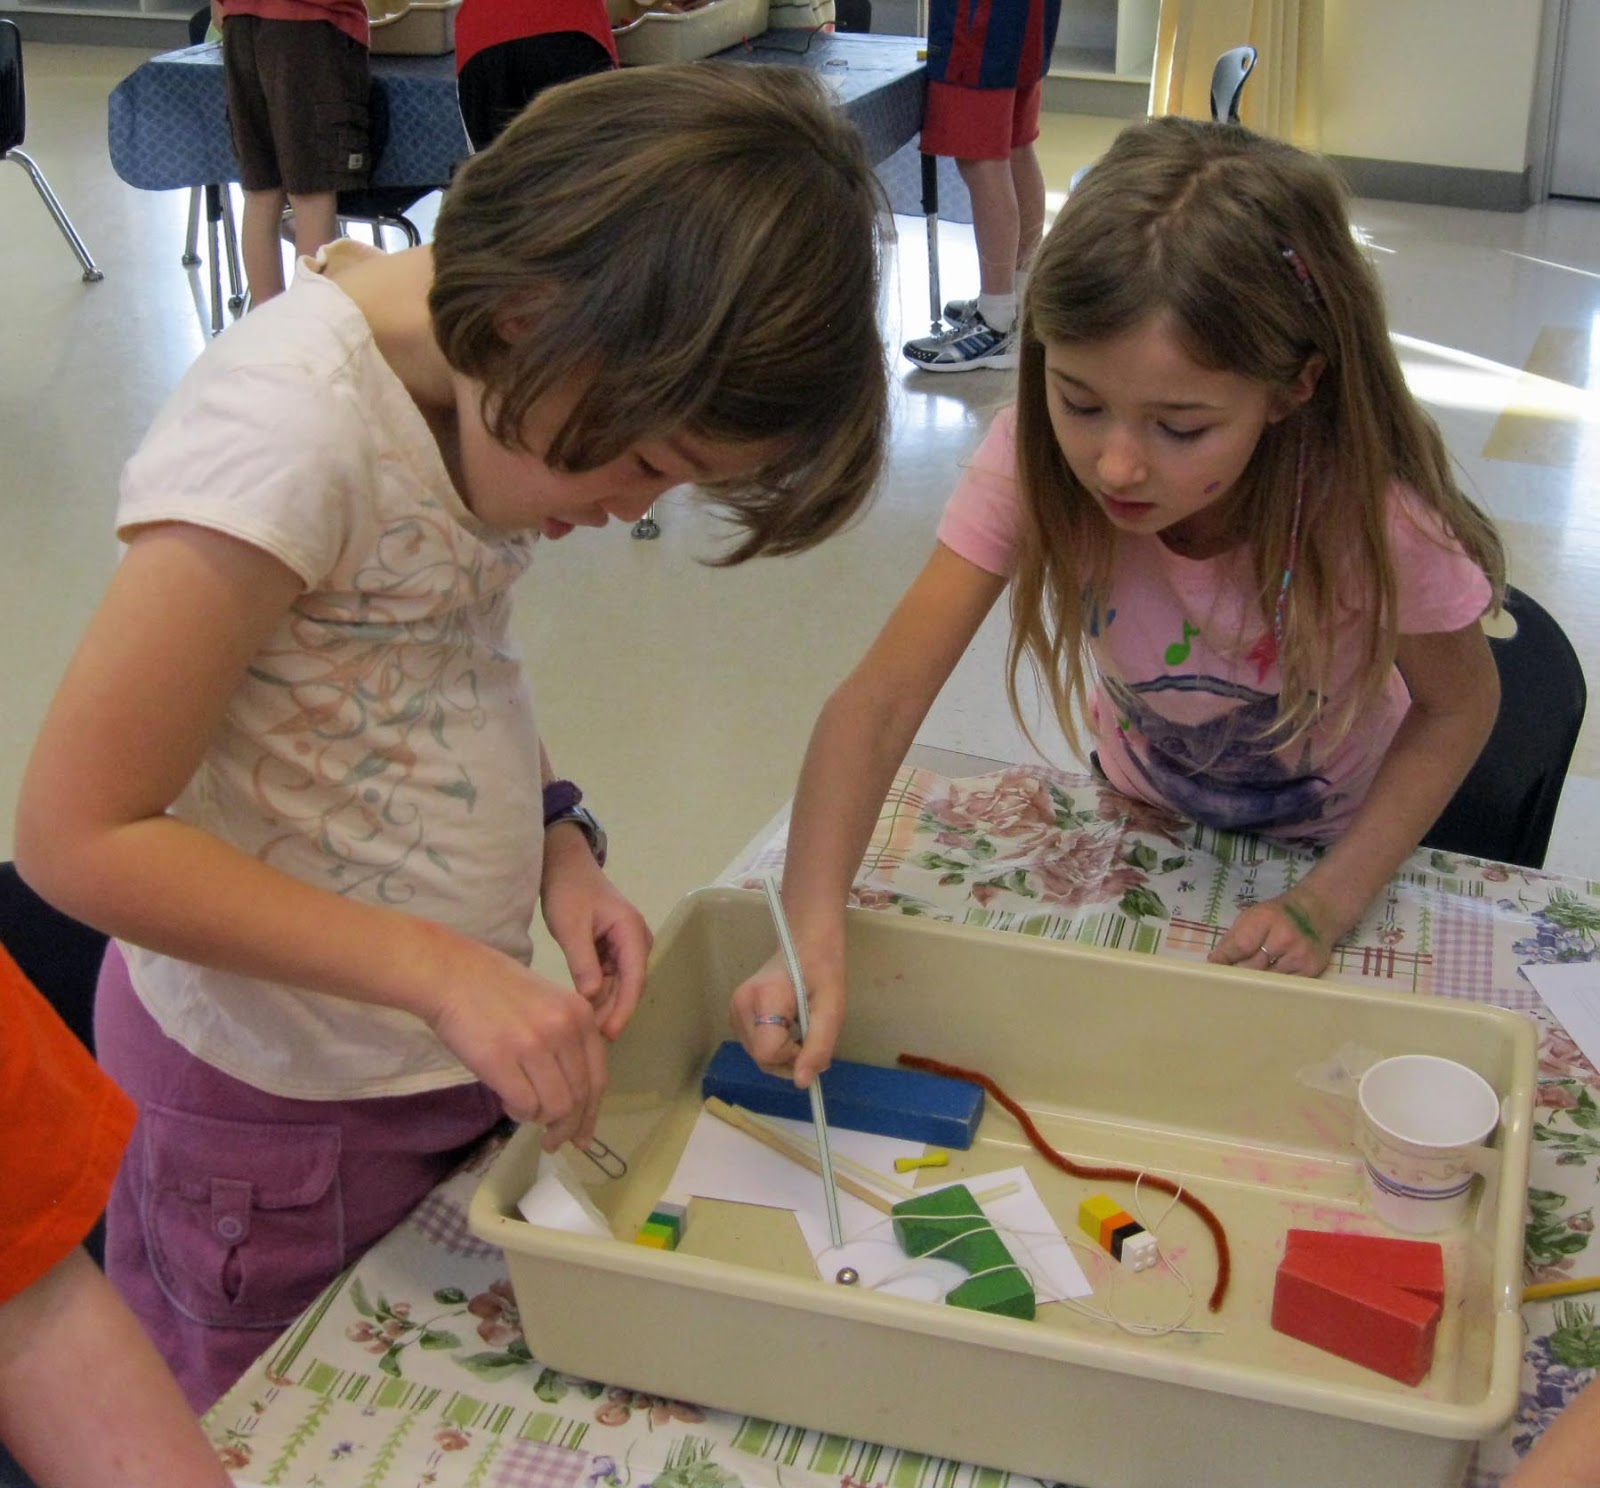
The series of photos below show various teams with some of their solutions.  These girls are using a straw to move the metal ball.


This child is making a container out of legos.


These girls are trying to make a solution using paper.


This group is using half of an egg an a rubber band to scoop the balls off the top of the cup.


Here the girls have made some device out of string.


Here is the clever use of a rubber band to pick up a marble.


Here the students are working on a more elaborate device.


What is interesting about this exercise is the how some groups just really seem to click and work madly to come up with a number of interesting solutions, and how other groups struggle to come up with just a few.  In general, the groups are randomly selected by counting off, so we don't group the students in a thoughtful way.  I have some groups who are lucky to come up with 4 or 5 solutions in 15 minutes, and others that come up with 17 or more.  The idea is not that the winner comes up with the most designs, but that the students should try and think creatively and this gives them a safe way to try it.

In general, the students like this activity.  Their enthusiasm is always the thing that keeps me coming back.  I was asked if I could come back and run this activity again the next day, and if I would come back the following week.  I just hope what I am leaving them with is a more positive outlook on science and engineering, and hopefully sparking an interest that will continue with them throughout school.